Step 1 : Log in to the system
Step 2 : Set up your basic TextCRM account. Connect your WhatsApp number during this initial setup.
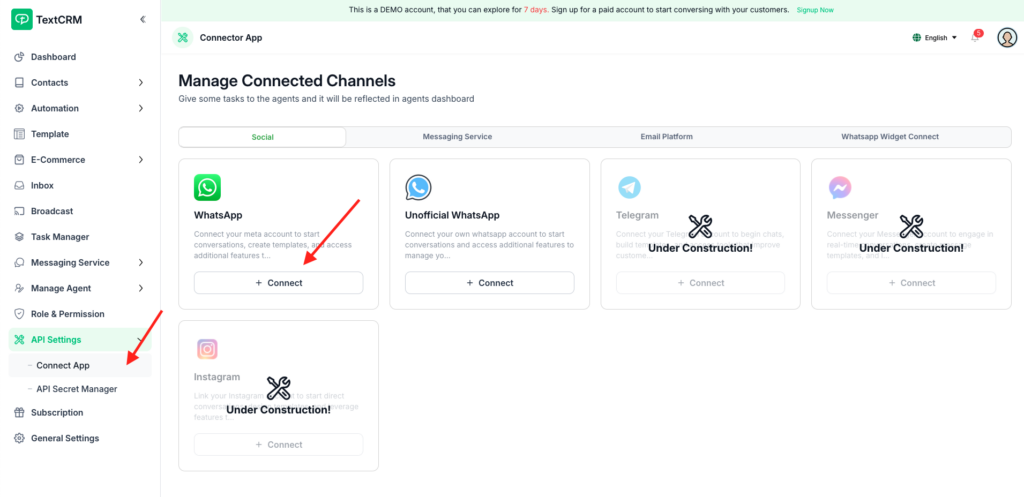
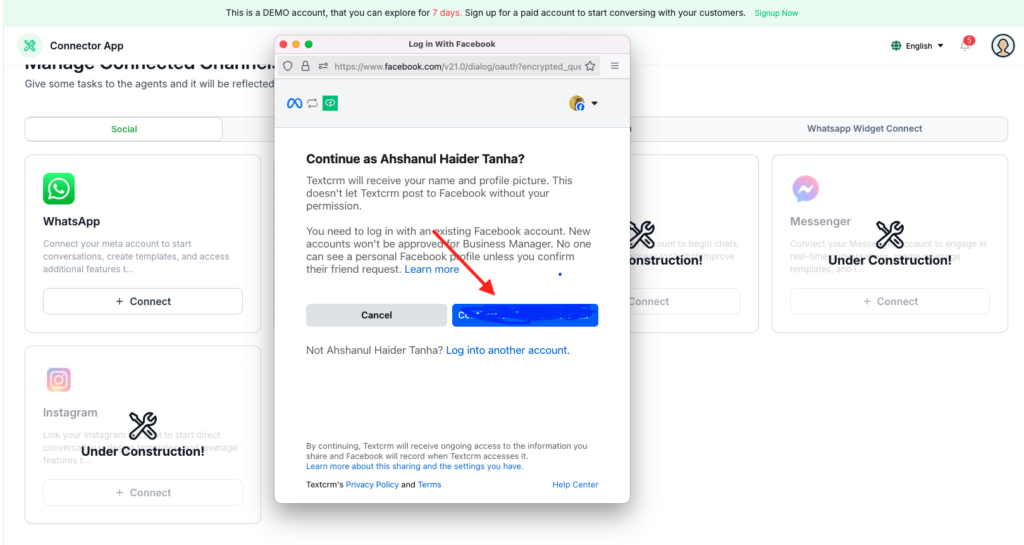
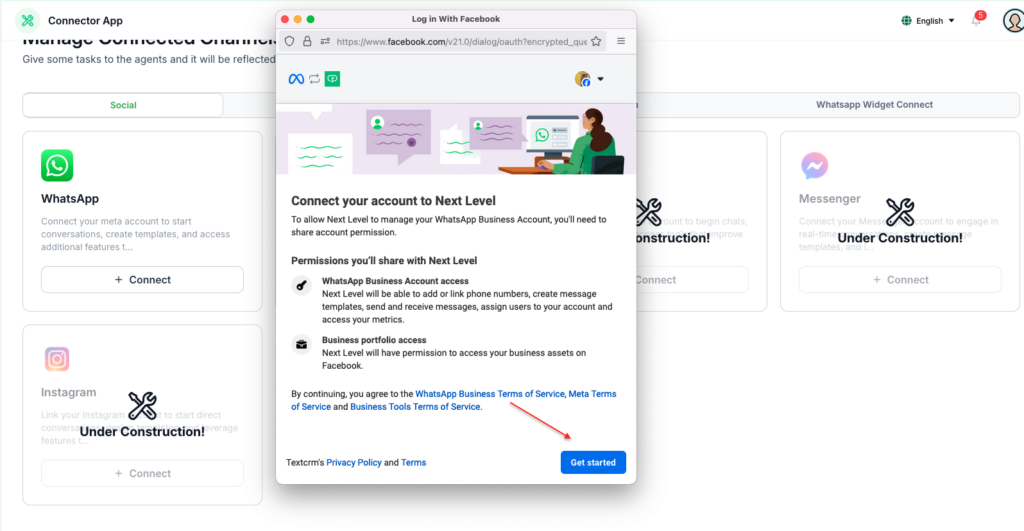
Step 3 : Navigate to API Settings, then click on Connect App. From there, select or connect your WhatsApp number. Complete the embedded sign-up process to link your WhatsApp account.
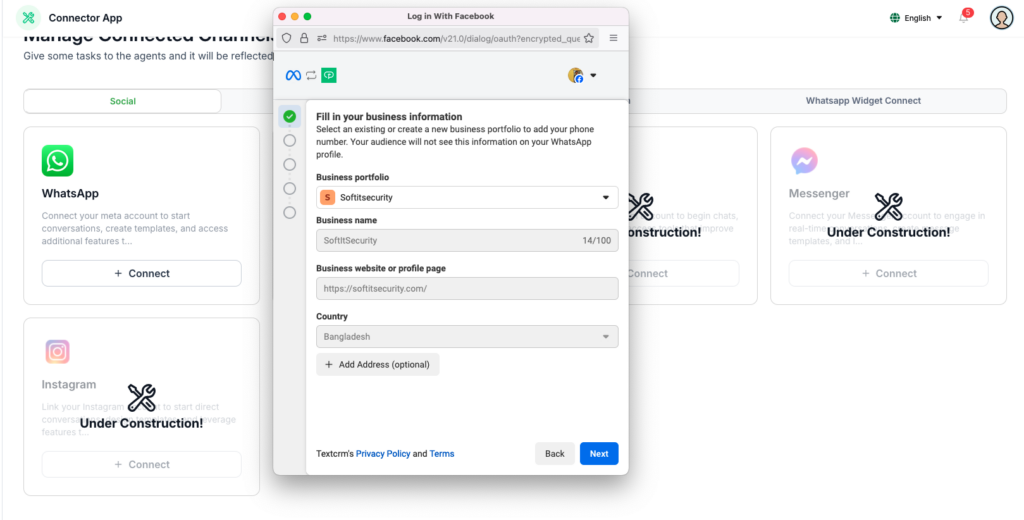
Step 4 : Add or select your business portfolio, including the business name, business website, or profile page. Then, select the country and click the Next button.
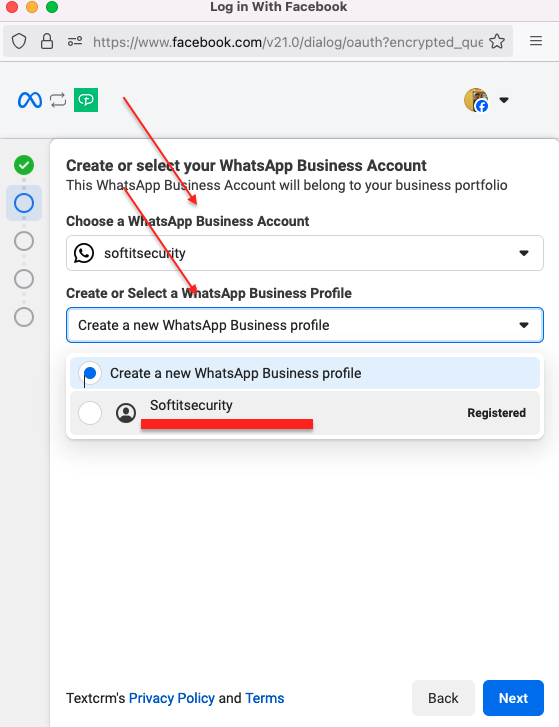
Step 5 : Create or select your WhatsApp Business account and profile number, then click the Next button. Next, click Continue, and allow a few seconds for the connection process to complete. You will then be directed to the final page. Here, you can finish the setup or add a payment method if needed.
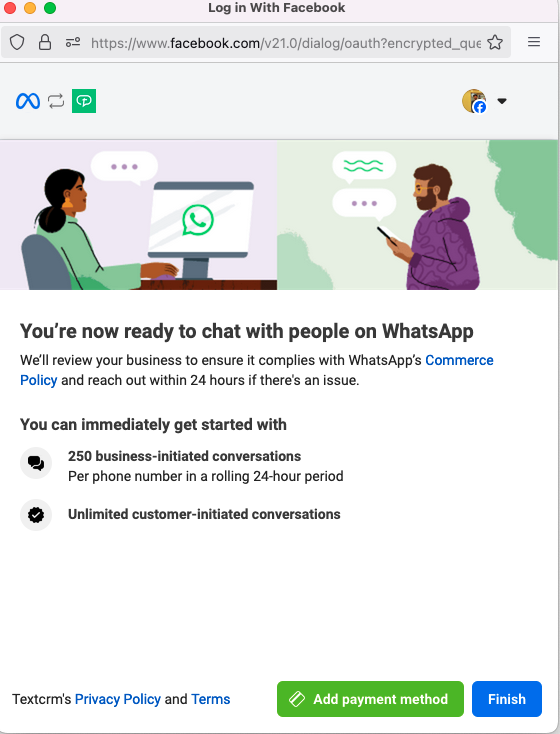
Step 6 : Click Finish to proceed. You will be redirected to the Connector Page, where a confirmation message will be displayed.
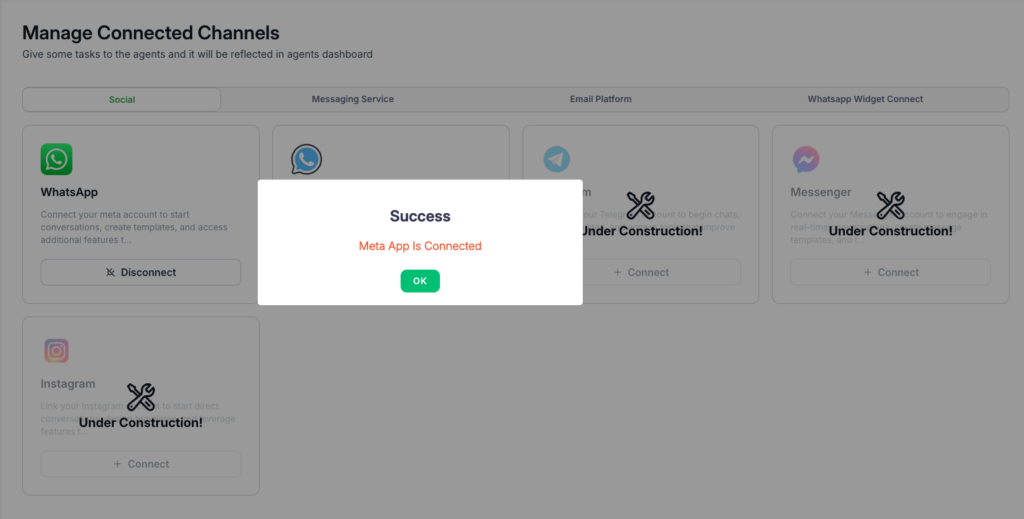
Your app or WhatsApp number has been successfully connected to the TextCRM platform. Thank you!


