Step 1 : Click on Automation and select Chatbot Flow
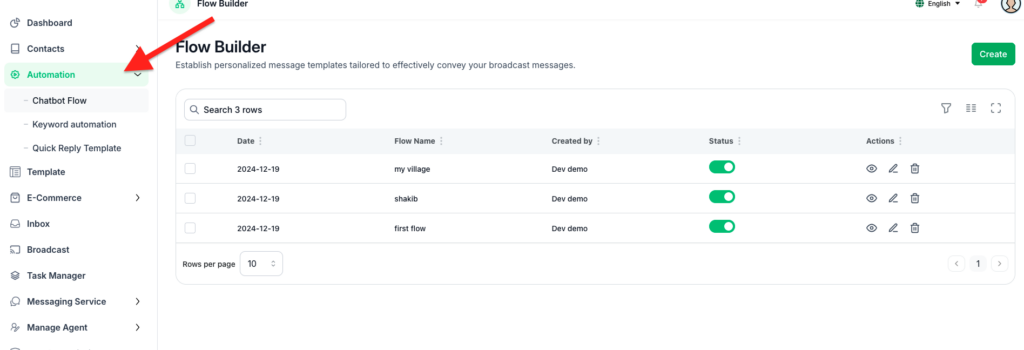
Step 2 : Click the Create button to open the chatbot creation page.
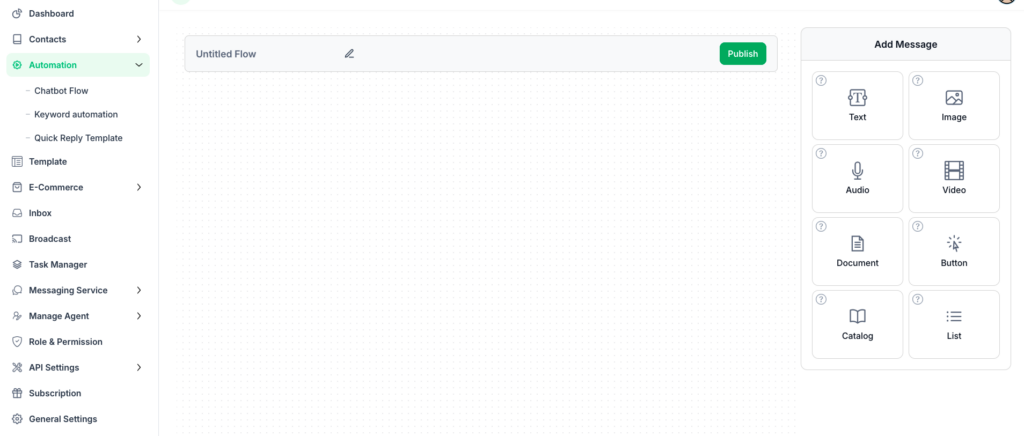
Step 3 : Enter a Flow Title and start designing your flow by drawing or building it using the drag-and-drop feature.
Step 4 : Add and customize message blocks, connect them, and finalize your flow design.
Add Messages :
- From the Add Message panel on the right, select the type of message you want to add (e.g., Text, Image, Audio, Video, Document, Button, Catalog, or List).
- Drag and drop the selected message type into the flow canvas.
Customize Messages :
- Click on each message block (e.g., Question Message, Question Button) to customize the content.
- For buttons, define button labels and connect them to the next step in the flow.
Add Multimedia :
- Add images, videos, or documents where needed by selecting the respective message type.
- Provide captions or additional information if required..
Define Navigation Paths :
- Link message blocks by connecting their output points (green dots) to the next block.
- Use buttons to define navigation paths for user interactions.
Save and Update :
- Once the flow is complete, click the Update button at the top to save your chatbot flow.

Note : Test the chatbot by running it and interacting with the messages to ensure all paths and messages work as intended.
These steps, along with the drag-and-drop functionality, make it easy to design a functional chatbot flow tailored to your needs.


